Japan Travel Apps 2026: 13 Apps to Download Before You Go
The Japan travel apps worth installing in 2026, by trip stage: train routes, Suica, taxis, translation and food, with English support and phone-number rules.
The "Will you use Tax-free QR Code?" question is gone. How to set up the tax-free QR on Visit Japan Web and pass the customs check for a Japan refund.
Visit Japan Web is a web service run by Japan's Digital Agency. Before you fly to Japan, you enter your immigration and customs details on it, then show a QR code at the airport to get through. Foreign visitors can also shop tax-free in Japan with its tax-free QR code, which you set up after you arrive.
Since 1 November 2026, tax-free shopping in Japan has worked differently: you pay the price with tax and claim the tax back after a customs inspection when you leave. At 7 airports, including Narita and Haneda, you can complete that inspection online through Visit Japan Web. On one trip to Japan, that means you may use Visit Japan Web at up to four points: before you fly, on arrival, when you shop tax-free, and when you leave.
This guide draws on official information from Japan's Digital Agency, the Japan Tourism Agency, the National Tax Agency, Japan Customs and the Immigration Services Agency, plus airport and company announcements and news reports, as of November 2026.
Key Takeaways
- Immigration and customs now share one QR code. You can use a screenshot of the entry QR, and each family member traveling with you needs their own.
- The "Will you use Tax-free QR Code?" question is no longer in the current manual. You set up the tax-free QR after you arrive in Japan.
- For purchases since 1 November, you pay the price with tax, pass a customs inspection when you leave Japan within 90 days of purchase, and the shop or its refund service provider pays the tax back. Anything bought by 31 October stays on the old system, and there is no transition period.
- On departure day, do the customs inspection before you check in your luggage. Once bags are checked, you cannot do it, and if one item on a receipt is missing, nothing on that receipt is refunded.
- Customs and the refund are separate steps. Passing customs pays nothing until your refund details are registered with the provider the shop uses.
- Japan's International Tourist Tax (the departure tax) rose to ¥3,000 per departure on 1 July and is included in your ticket.
Visit Japan Web lets you register your immigration details (the Entry Record, or ED card) and customs declaration before you arrive, and generates a QR code to show when you enter Japan (Digital Agency). You can fill it in on a computer, but on arrival you must show the QR code on your phone or tablet.
You do not have to use it. The Immigration Services Agency recommends submitting electronically through Visit Japan Web, but if you are not comfortable with a smartphone, you can still hand in a paper ED card at the airport (Immigration Services Agency). Whether you can enter Japan without a visa depends on your nationality; see the list from Japan's Ministry of Foreign Affairs.
Two things to watch:
For the other apps worth installing before you go, see Japan travel apps for 2026.
You can fill in Visit Japan Web once your flights and accommodation are booked. The Digital Agency's how-to guide splits the steps before departure into 4 steps (Digital Agency guide):
| What to have ready | Which step |
|---|---|
| Email address, passport | Create account, register users |
| Flight number, arrival date | Register planned entry |
| First night's accommodation: name, address, phone | Register planned entry |
| Occupation, purpose of visit, intended stay | Immigration |
| Items you carry (cash, items to declare) | Customs declaration |
The Immigration Services Agency notes that the length of stay is often entered incorrectly: for sightseeing and other short stays, enter 90 or fewer in the "days" field (Immigration Services Agency).
Family members traveling with you can be added to the same account, but each person's details must be entered separately, each person gets their own QR code, and each shows their own code on arrival (Immigration Services Agency). Do not generate a code only for yourself.
Still planning this Japan trip? Type where you're going and Aizzie drafts an itinerary you can edit. "Fill in Visit Japan Web" and "Do the customs inspection before checking bags" go on the same trip's to-do list, where tripmates who open the trip can see them.
Older guides tell you to answer "Will you use Tax-free QR Code?" with Yes or No when you register your details. That question is not in the current instruction manual (Visit Japan Web manual, Version 3.17), and it did not appear on the "Your details" screen when we logged in to check. There is nothing to answer at this step. After the two category questions (Japanese passport and re-entry permit), you only choose "Scan with camera" or "Enter information yourself" for your passport details.
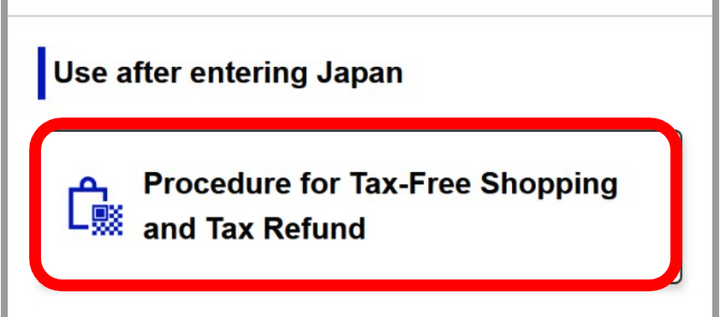
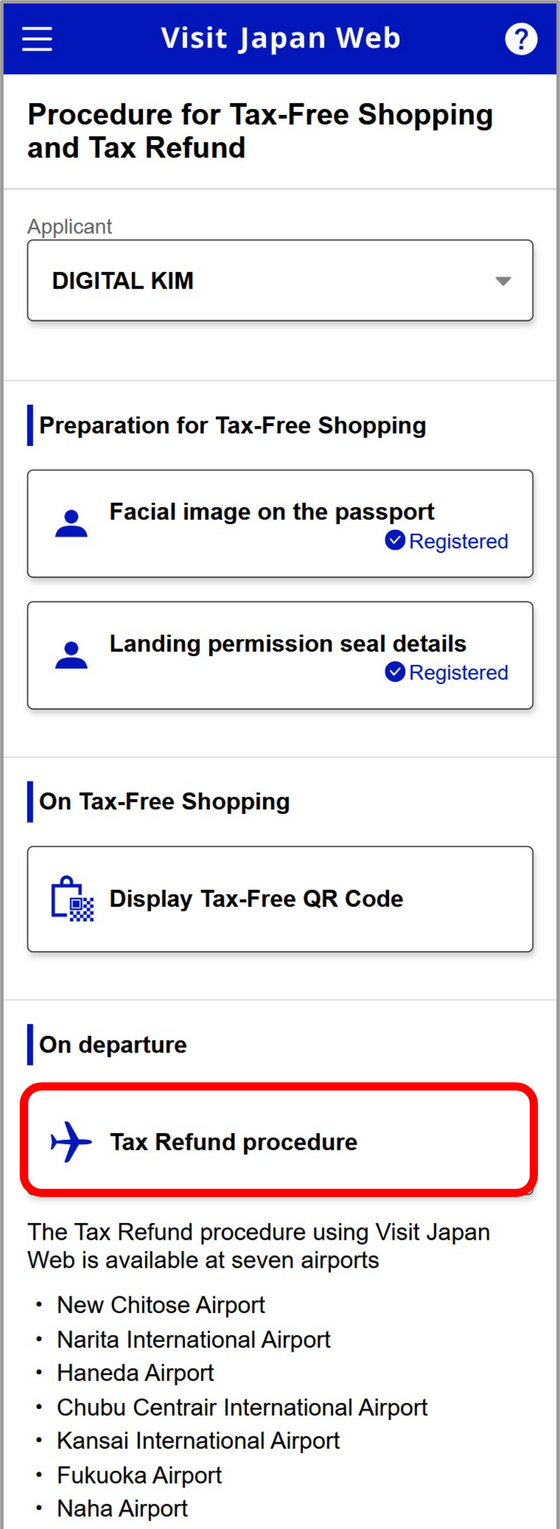
The setup now sits on the home screen under "Procedure for Tax-Free Shopping and Tax Refund", and you finish it in Japan because it reads the landing permission seal, the sticker immigration places in your passport on arrival. What you register depends on what you want to use (same manual, section 9-1):
If you edit the passport number or nationality for yourself or a family member, update the seal details. When the period of stay on the seal expires, its status returns to "Not Registered".
Automated gates leave no entry stamp in your passport. The National Tax Agency warns that a tax-free shop may then be unable to confirm you are eligible, and tells you to ask immigration staff for the stamp after the gate and before the customs inspection on arrival (National Tax Agency notice, in Japanese). Takashimaya says it cannot process tax-free purchases if you used an automated or facial recognition gate and have no stamp (Takashimaya, in Traditional Chinese).
You do not need the tax-free QR to shop tax-free: you can show your passport instead. Each shop decides whether to accept Visit Japan Web (National Tax Agency Q&A, in Japanese), and the Japan Tourism Agency tells travelers that not every tax-free shop accepts it and to check with the shop first (Japan Tourism Agency).
The tax-free QR remains valid under the refund system. The National Tax Agency's Q&A on the refund method says that, for Temporary Visitor, Diplomat and Official status, a Visit Japan Web code holding your passport details counts as showing your passport. Carry your passport anyway. The same Q&A tells shops that taking passport details through Visit Japan Web helps prevent typing errors in the purchase record. As a rule, if errors in the record prevent customs from confirming it, no refund is paid on it (National Tax Agency Q&A, in Japanese).
Since 25 January 2024, immigration and customs have used a single QR code. Show it at the immigration counter, then again at a customs electronic declaration terminal or inspection table (Digital Agency guide). At seven airports (New Chitose, Narita, Haneda, Chubu, Kansai, Fukuoka and Naha), you can complete the customs declaration at an electronic declaration terminal while you wait for your bags (Japan Customs). Some airports have joint kiosks: scan the QR code and your IC passport, and the kiosk takes the information immigration and customs need in one go (Immigration Services Agency).
Online guides that tell you to show two QR codes were written before January 2024.
You can use a screenshot of the entry QR, but if you change your registered details, you need to generate a new QR code and take a new screenshot (Immigration Services Agency). Airport networks are not always reliable, so the safer approach is to generate the QR code and screenshot it before you leave. At the airport, open the page directly if you can get online, and keep the screenshot as a backup. You still need to carry your original passport.
If you plan to rent a car in Japan, use a staffed gate to get an entry stamp, because it proves your landing date. See driving in Japan as a tourist.
For purchases made on or after 1 November, you pay the price with tax at checkout. When you leave Japan within 90 days of purchase, you pass a customs inspection at the airport or seaport, and the shop, or a refund service provider the shop uses, pays back the consumption tax (Japan Tourism Agency). The Japan Tourism Agency calls this the Refund Method (same source).
Which system applies depends on the purchase date, not the departure date: anything bought by 31 October follows the old system and is tax-free in the store, even if you leave Japan after November begins (National Tax Agency Q&A). There is no transition period in which both systems run (National Tax Agency).
| Item | Bought by 31 October | Bought from 1 November |
|---|---|---|
| Price at checkout | Price before tax | Price with tax |
| Minimum spend | ¥5,000 or more before tax, one store, one day | Unchanged |
| General goods and consumables | Counted separately | No longer separated |
| Consumables | Special packaging, ¥500,000 cap | Packaging rules and spending cap removed; using any in Japan voids that receipt's refund |
| Unit price ¥1 million or more, before tax | - | Shop also records the serial number and other product details |
| Getting the tax back | Tax-free at checkout | Shop or refund service provider pays after customs inspection |
The table follows the Japan Tourism Agency's comparison of the old and new systems (Japan Tourism Agency comparison table), and the rule that consumables used in Japan cannot be refunded comes from the agency's traveler FAQ. As for quantity, you can only buy as much as you can take with you when you leave Japan.
The 90 days start the day after purchase. In the National Tax Agency's example, goods bought on 1 November must pass customs by 30 January of the following year (National Tax Agency).
How much you get back depends on the tax rate, because the tax is already in the price. Most goods are taxed at 10%, so the most you can get back is 10/110 of the price with tax, about 9.1%. Food and drinks other than alcohol currently carry the reduced 8% rate, so the most is 8/108, about 7.4% (National Tax Agency, in Japanese). On cosmetics costing ¥11,000 with tax, the most you can get back is ¥1,000, and the refund service provider may deduct a fee from that. Cash Japan, for example, has a standard fee of 10% of the refund for airport cash, on top of any charge from the shop or the underlying refund operator (Executive Traveller).
At shops that accept it, you can show Visit Japan Web's tax-free QR code instead of your passport details (Visit Japan Web manual, section 9-1). It is available only to foreign nationals whose status of residence is Temporary Visitor, Diplomat or Official, and you must first use your phone's camera to scan your passport and the landing permission seal placed in it on arrival. Screenshots of the tax-free QR are not accepted.
Not every shop accepts the tax-free QR, and some still ask to see your passport, so carry it when you shop.
| Feature | Entry QR | Tax-free QR |
|---|---|---|
| Used for | Immigration and customs declaration | Replaces passport details at tax-free shops |
| Where you show it | Immigration counter, customs | Shops that accept the tax-free QR |
| What it needs | Planned entry and entry procedure details | Passport photo and landing seal, scanned by camera |
| Screenshot allowed? | Yes, but regenerate after changing details | No |
The shop explains how your refund will be paid when you buy. The Japan Tourism Agency and the National Tax Agency only give examples: bank transfer, credit card, app transfer, and cash at the airport or seaport when you leave. The actual options depend on the shop (Japan Tourism Agency FAQ).
A refund takes three separate steps:
Passing customs pays nothing by itself. After a Completed result, the National Tax Agency says to follow the refund instructions the shop gave you (National Tax Agency FAQ, in Japanese). Shops use different providers, so you may have to register with two or three of them, and without refund details the money does not arrive, according to the head of the Japan Shopping Tourism Organization (CNA via UDN, in Chinese).
Each provider sets its own terms. Don Quijote gives you 180 days from purchase to register a refund method, and only on its designated site (Don Quijote, in Traditional Chinese). Check the deadline for each shop, and do not assume another provider allows the same time.
Leave time for registration. Taiwan's ETtoday tested the process and reported a passport photo, and at some providers the landing seal, an address and a 3D face scan, taking tens of minutes in all. It also warns that an eSIM or swapped SIM may miss the SMS verification code (ETtoday, in Chinese). For a card refund, the name on the card should match your passport (Takashimaya).
You may pay a fee to get your refund. The Japan Tourism Agency's FAQ for tax-free shops says that when a shop outsources refunds to a refund service provider, the law does not specify whether the traveler or the shop pays the fee. The shop and the provider decide, and the FAQ notes that in other countries the traveler usually pays. The government itself charges no fee.
The same FAQ says shops can issue refunds in coupons or points usable only at specific facilities, and can agree with you in advance that no refund is paid if you do not claim within a set number of days.
Fees differ widely between shops. PPIH, the group that runs Don Quijote, says refund claims at all its group stores in Japan are free; only collecting cash at the airport carries the refund provider's fee (PPIH press release). Takashimaya deducts a system fee of 23% of the tax amount, or 21% on purchases of ¥1 million or more before tax (Takashimaya). Shops can change terms like these, so go by what the shop tells you at checkout.
Small refunds to a bank account can disappear. Before the new system began, Taiwan's SET News reported a shared post from a traveler claiming about ¥1,100 through the refund company Ocean. A provider fee and a TWD 400 charge from the traveler's bank wiped out the refund. Ocean later said it would contact affected travelers and offer compensation (SET News).
So before you pay, ask three things: how the refund is paid, what the fee is, and how long you have to claim.
Pay for food, drinks, cosmetics and other consumables you will use up in Japan separately from the tax-free goods you are taking home. Customs checks each purchase receipt as a whole, and if even one item on a receipt is not with you, none of the goods on that receipt are refunded (Japan Tourism Agency). Goods that are not consumables, such as clothes or a bag, still qualify for the customs inspection after you use them in Japan, as long as you take them out of the country (Japan Tourism Agency FAQ for tax-free shops, in Japanese).
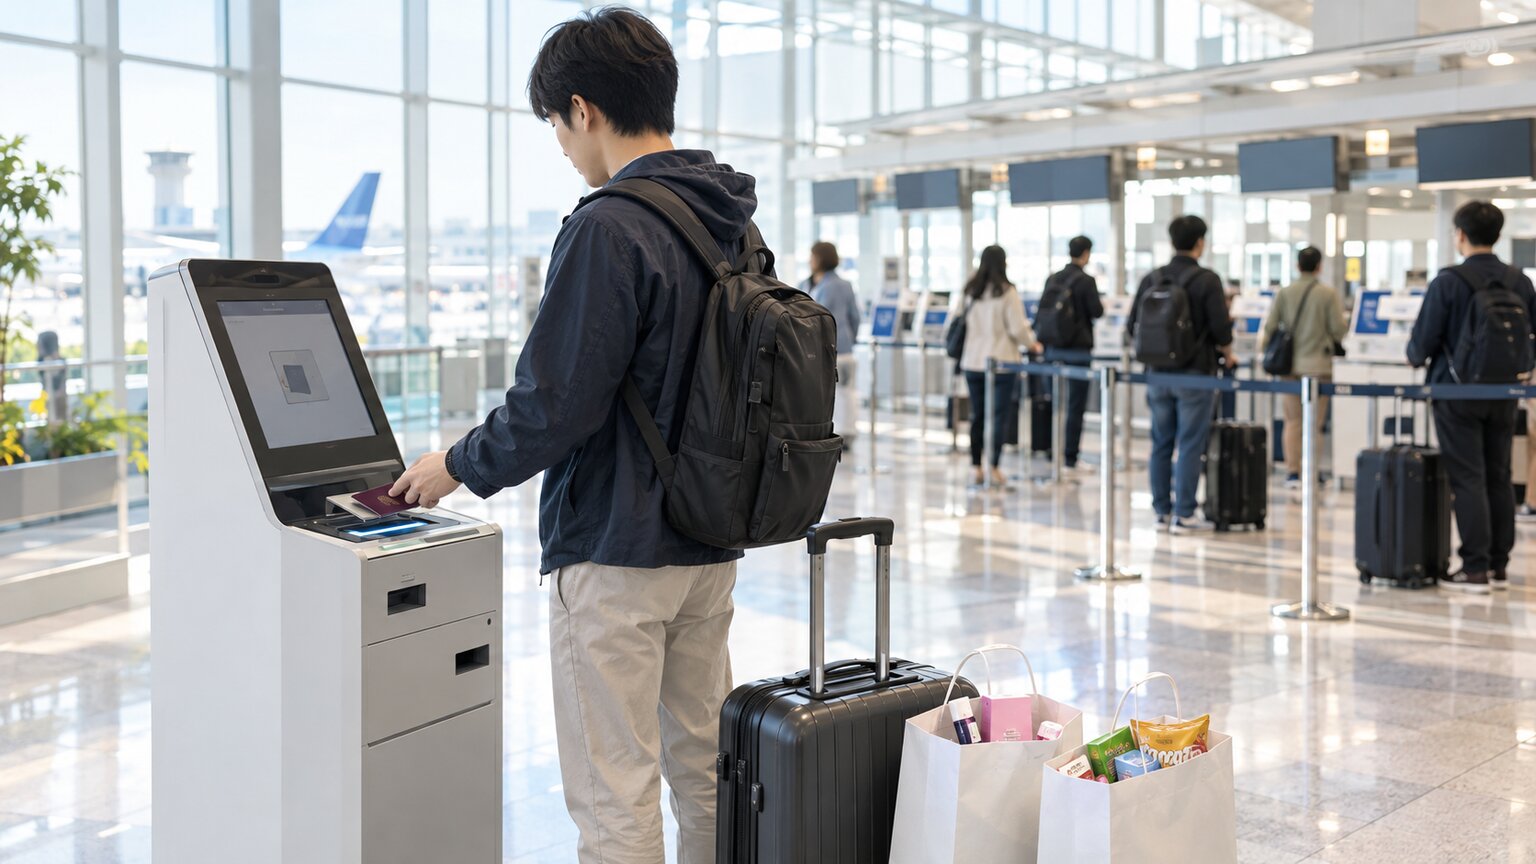
At the airport, before you check in your luggage, present your passport at a tax-free procedure terminal (kiosk) in the departure lobby (Japan Tourism Agency). Under the old system, customs checked goods after the security checkpoint; under the new one, the check happens before security (Japan Tourism Agency leaflet). The check takes only a few seconds, from passport scan to result. A Green Result means you are done; a Red Result means taking all your tax-free goods to the customs inspection area to show customs (Japan Tourism Agency).
At 7 airports (Narita, Haneda, Kansai, Chubu, Fukuoka, New Chitose and Naha), you can skip the kiosk and complete the process online through Visit Japan Web. You do it in designated areas of the international departure lobby before the security checkpoint, after connecting to a dedicated Wi-Fi network. Japan Customs says Visit Japan Web must be set up and ready to use before the customs inspection, and that you should use the kiosk if the online procedure does not work (Japan Customs). If you leave Japan by ship, seaports also have tax-free procedure terminals (Japan Tourism Agency). Other airports are kiosk only: Sendai, for example, has no Visit Japan Web procedure and no cash refund (Sendai Airport).
Use the kiosk unless you have a reason not to, because it needs no Visit Japan Web registration (National Tax Agency FAQ, in Japanese). Visit Japan Web is the alternative if kiosks are crowded, as Chubu Centrair suggests (Centrair), or if you have already set it up. Kansai Airport goes further and recommends it for a smoother experience (Kansai Airport).
Kansai Airport's website explains how to do it through Visit Japan Web, summarized here in three steps (Kansai Airport):
Japan Customs lists the same network for all 7 airports: name Customs_WiFi_For_TaxRefund, password jcustoms (Japan Customs). Because the password is public, it does not prove a hotspot is the real one, so match the name exactly and join only in the designated area. Open Visit Japan Web yourself and check that the address belongs to digital.go.jp before you scan your passport. Visit Japan Web asks you to connect to the dedicated Wi-Fi first and shows an error if the connection drops (National Tax Agency FAQ, in Japanese), so stay in the designated area and on that network until you tap Confirm. If you cannot connect, use the kiosk.
Once connected, log in, tap "Tax Refund Procedure" (the National Tax Agency's guide calls it "Refund Procedure"), review your purchase records, tap Confirm and read the result (National Tax Agency guide). Purchases appear even if you did not show the Visit Japan Web QR at the shop, and the screens are in English only. Tap Confirm before you check in your bags.
| What you see | What to do |
|---|---|
| Completed | Customs is done. Check in, then follow the shop's refund instructions |
| Not Completed | Take your goods to the customs inspection area. If you skip it, you get no refund |
| Not approved or expired | Customs found the goods missing, or 90 days passed. No refund |
| Disabled: No purchase record found | Check History and refresh the page. If the purchase is still missing, ask the shop |
| Your passport information could not be verified | Log in again. If it repeats, use the kiosk |
| Currently unavailable | Log in again. If it repeats, use the kiosk |
| Error, please check it | The shop may be correcting the record. Keep refreshing or ask the shop |
| Your Wi-Fi connection was lost | Reconnect to the dedicated Wi-Fi and tap Confirm. If it repeats, use the kiosk |
| The record of purchases that was been updated | Review the records and tap Confirm again |
The table follows the National Tax Agency FAQ. If you close the result screen, the History button shows your status for about 6 weeks. Ask the shop, not customs, about the status of your refund.
Kansai Airport's tax refund page also says the inspection can only be done on your departure day and needs no boarding pass. Kiosks run 24 hours, and customs officers are on duty from the start of check-in until security closes. If the shop offers a cash refund at Kansai Airport, you collect it in yen at a cash refund counter or machine after passport control.
Hours differ by airport. At Haneda, Terminal 2 kiosks run from 6:00 to 26:00 (2 a.m.) and Terminal 3 kiosks run 24 hours, with cash machines after passport control (Haneda Airport, in Japanese). ETtoday counts cash machines at 8 airports, the 7 above plus Kobe, and advises a card refund if you leave from anywhere else. Not every shop pays cash either (CNA via UDN).
| Situation | Result |
|---|---|
| Bags already checked in | You cannot complete the inspection, and cannot get your bags back to do so |
| One item from a receipt is missing | Nothing on that receipt is refunded |
| Items eaten or used in Japan | Skip the kiosk and tell a customs officer at the counter |
| Inspection abandoned to catch a flight | Counts as not done; no compensation from airline or customs |
| Connecting from a domestic flight | Do it at the airport where you finally leave Japan |
| Unit price ¥1 million or more, before tax | Customs may ask for an appraisal or warranty certificate; have it ready |
| Power bank among tax-free goods | Power banks go in carry-on luggage; pack them separately from goods you check in |
The first six rows follow the Japan Tourism Agency's traveler page and FAQ. The last row follows the Japan transport ministry (MLIT) dangerous goods list: power banks (up to 160Wh) are not allowed in checked baggage on flights, only in carry-on.
The National Tax Agency's multilingual notice also says that once your luggage is checked in, the customs inspection cannot be done, and asks you to allow enough time (National Tax Agency), but it does not say how early to arrive. First-day reports were mostly smooth at customs: Hong Kong tour groups praised the roll-out (SCMP), and travelers relayed by Taiwan's Newtalk described fast kiosks with little queueing. The refund side had more trouble, including failed Cash Japan machines and a Yodobashi refund center with no connection and queues of 30 minutes or more (Newtalk, TVBS, both in Chinese). These are launch-day reports, so keep your departure day light when you plan the itinerary.
If you are choosing a planning tool, see the best free AI trip planners in 2026. When packing, put your tax-free goods together in one bag so you can take them out at the kiosk or at customs.
Japan's International Tourist Tax, often called the departure tax, rose from ¥1,000 to ¥3,000 per departure on 1 July 2026. Airlines and shipping companies add it to the fare, so you do not pay it separately (National Tax Agency).
Tickets bought before 1 July with the departure date already set are still charged ¥1,000. If you change the departure date on or after 1 July, the ¥3,000 rate applies (National Tax Agency Q&A). Children under 2 and transit passengers leaving within 24 hours of arrival, among others, do not pay it.
Yes. The Immigration Services Agency recommends submitting your entry details electronically through Visit Japan Web, but if you are not comfortable with a smartphone, you can still hand in a paper ED card (as of November 2026).
Once your flights and accommodation are booked, and at the latest before you reach immigration. You can fill it in on a computer, but you show the QR code on a phone or tablet on arrival, so take a screenshot as a backup before you leave.
You should not see this question now. The current Visit Japan Web manual no longer includes it. After you arrive in Japan, open "Procedure for Tax-Free Shopping and Tax Refund" and register your passport's facial image and landing permission seal details to create the tax-free QR. You can also shop tax-free by showing your passport, and not every shop accepts the QR (Visit Japan Web manual, as of November 2026).
No. You can scan your passport at a tax-free procedure terminal without registering on Visit Japan Web (National Tax Agency FAQ). The online procedure is an alternative at 7 airports.
For purchases since 1 November, you pay the price with tax. When you leave Japan within 90 days of purchase, you pass a customs inspection at a tax-free procedure terminal at the airport or seaport, and the shop or its refund service provider pays you back. At 7 airports, including Narita and Haneda, you can also do it online through Visit Japan Web.
At all 7 airports, Visit Japan Web must be ready to use before the customs inspection, which means registering your landing permission seal details once you are in Japan. You open it on the dedicated Wi-Fi in the departure lobby before security, and if the online procedure does not work, you use the kiosk (Japan Customs). At Kansai Airport, for example, you complete the tax refund registration in Visit Japan Web after arriving in Japan and upload your passport details by the day you leave. The result then appears on your phone, and you do not need a boarding pass (Kansai Airport, as of November 2026).
It depends on the shop's refund provider. Passing customs does not pay anything by itself, so check that you registered your refund details with each provider. For refund status, ask the shop or the contact it gave you, not customs (National Tax Agency FAQ, as of November 2026).
No. The customs inspection must be done before check-in, and you cannot get checked bags back to do it. Bring every tax-free item on each receipt to the inspection; if one is missing, nothing on that receipt is refunded.
There may be. When a shop uses a refund service provider, the law does not say whether the traveler or the shop pays the fee, so it varies by shop, and the government charges no fee. Don Quijote says it does not charge, except for cash collected at the airport, while Takashimaya deducts 23% of the tax amount, or 21% on purchases of ¥1 million or more before tax. Refunds to a bank account outside Japan may also carry a transfer fee, so ask how the refund is paid at checkout (as of November 2026).
From 1 July 2026, ¥3,000 each time you leave Japan, included in your plane or ferry ticket. Children under 2 and transit passengers leaving within 24 hours of arrival, among others, are exempt.
Planning your next Japan trip? Type where you're going and Aizzie drafts the itinerary. Then add three items to its to-do list: fill in Visit Japan Web, keep your refund receipts, and leave extra time at the airport on departure day, and check them off with your tripmates.
Found outdated or wrong info?
The Japan travel apps worth installing in 2026, by trip stage: train routes, Suica, taxis, translation and food, with English support and phone-number rules.
Driving in Japan as a tourist in 2026: which license papers to carry, the 30 km/h residential road limit from September 1, and how far to drive in a day.
Compare 8 free AI trip planners on input formats, editing, collaboration and offline access, plus where AI itineraries break and how to check them.
Plan your trip with Aizzie
Sign up free